1. Start the Microsoft Outlook program.
Use the Start menu to start Outlook 2010 or newer. If you’ve never used Outlook before, it will usually prompt you to create a new account. In that case, skip ahead to step 2.
If Outlook doesn’t prompt you, click the File tab:
Then make sure that Info is selected on the left and click the Add Account button:
2. The “Welcome to Outlook” window appears.
When this window appears:
- Enter your email address as [email protected]
- Click Advanced Options
- Click Let me set up my account manually
The window should look like this:
Then click Connect.
3. The “Choose Account Type” window appears.
The window looks like this:
Click POP.
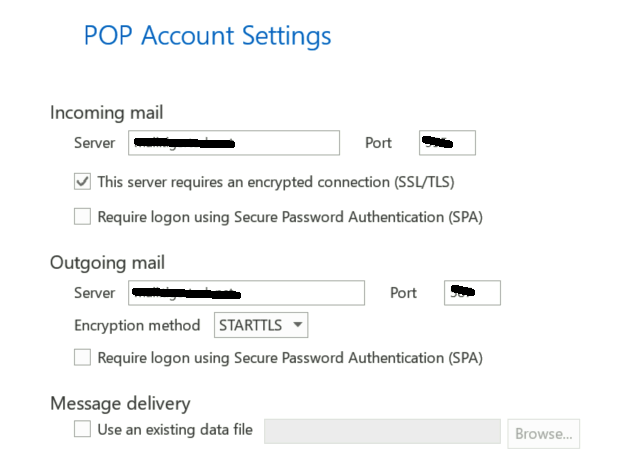
4. The “POP Account Settings” window appears.
This is the window where you’ll enter most of your account settings:
| Incoming mail server: | Provide by Hosting |
| Incoming mail port: | Provide by Hosting |
| This server requires an encrypted connection (SSL/TLS): | Request by Hosting |
| Outgoing mail server: | Provide by Hosting |
| Outgoing mail port: | Provide by Hosting |
| Outgoing mail encryption method: | Request by Hosting |
Make sure that the two “Require logon using Secure Password Authentication (SPA)” checkboxes are not checked.
The window should look like this:
Click Next.
5. Outlook asks for your password.
Type the email password you chose when you created this email address, then click Connect.
6. Outlook setup is complete
You’re finished! Try sending yourself a test email message to make sure it works.